How to create a website – beginner’s guide

Need to establish an online presence for yourself or your business but don’t know where to start? If your answer is yes, you’ve landed on the right page! This article is the ultimate guide to help anyone – from bloggers to small business owners – to create their own site without having to learn coding. After reading this article, you should be able to create a website on your own quickly and easily, so you don’t have to spend money on web developers.
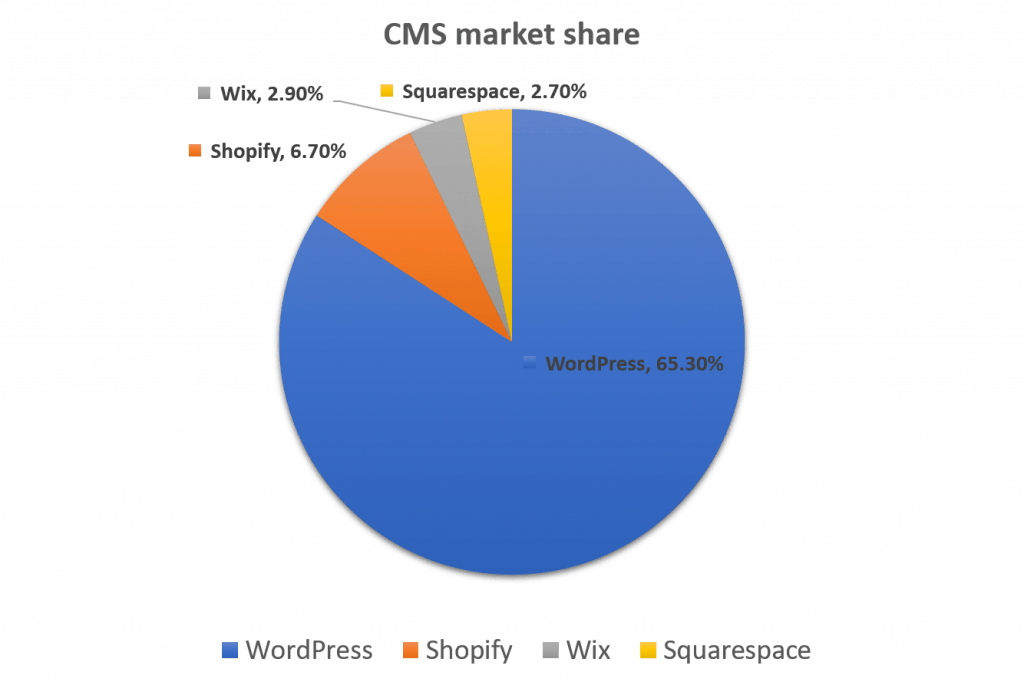
Note: This guide uses WordPress as the site building platform. WordPress has been the most popular CMS (content management system) and site building platform since 2011.
There are mainly two ways to create a website:
Automatically (recommended): These days, many web hosting companies have integrated one-click installation for WordPress. If you don’t have time, patience or Linux server knowledge, we recommend that you select the WordPress Hosting plan from well-established and reliable web hosting companies.
Manually (not recommended for beginners): If you’re comfortable playing with codes and commands, and you have the time and patience, just follow the step-by-step instructions in this post to start creating your website manually.
Create a WordPress site automatically
To create a WordPress site automatically, you just need to select a WordPress hosting plan that has integrated one-click installation for WordPress.
There are hundreds of thousands of web hosts out there, and most of them meet the WordPress minimum requirements. We know that it can be a chore for you to choose one from the crowd, so we’ve picked the best WordPress hostings for you:
According to WordPresss.org, the hosts above represent some of the best and brightest of the hosting world. The listing includes criteria like: contributions to WordPress.org, ease of WP auto-install and auto-upgrades, size of customer base, design, ect.
Bluehost
Powering over 2 million websites, Bluehost provides WordPress hosting plans that are tuned for WordPress: WordPress-centric dashboards and tools, along with 1-click installation, a FREE domain name, email, FTP and more. The WordPress hosting plans from Bluehost is easily scalable and backed by 24/7 support by in-house WordPress experts.
To create a website with the WordPress hosting plan from Bluehost:
- Go to Bluehost.com.
- Choose the WordPress hosting plan that suits you the best.
- If you already have a domain, type it there. If not, Bluehost offers Free domain for the 1st year, so you can pick up a domain from Bluehost.
- Fill in your information and choose your hosting length.
- Complete the payment process and create your account.
- Log in to Bluehost and use “one-click WordPress install” to Install WordPress.
That’s it! With just one click, your WordPress site will be automatically installed quickly.
DreamHost
DreamHost is another famous WordPress hosting provider which has been committed to WordPress and its community for over 10 years. The WordPress hosting plans from DreamHost are optimized for WordPress, offering choice, performance and value for new users and experts alike.
What’s more, DreamHost’s support team are WordPress experts who actively contributes to the WordPress community, so if you’re new to website, at DreamHost, you just need to foucus on content creating, since their team of experts will handle everything for you.
DreamHost offers reliable, lightning-fast hosting solutions optimized for WordPress. Based on your needs, you can choose from the following WordPress hosting plans at DreamHost:
- WordPress Basic: the most affordable way to get all the basics for your WordPress site.
- DreamPress: managed WordPress hosting. Hassle-free, high-performance WordPress to grow your business.
- WooCommerce Hosting: fast, secure, and optimized for Woocommerce.
- VPS for WordPress: US-Based VPS (Virtual Private Server). Expandable RAM & Storage. Unhindered Performance. Managed Security. A powerful solution for those with multiple WordPress sites, or anyone who just wants control over their WordPress resources.
To create a website at DreamHost:
- Go to DreamHost.com.
- Choose your WordPress hosting plan to sign up.
- If you already have a domain, type it there. If not, just pick up a domain at DreamHost. For some WordPress hosting plans, DreamHost offers a free domain for the frist year.
- Fill in your information and choose your hosting length.
- Complete the payment process and create your DreamHost account.
- Log in to DreamHost to Install WordPress with 1-click.
SiteGround
SiteGround is a web hosting provider founded in 2004. At SiteGround, you can manage your WordPress sites easily and with more freedom. SiteGround provides the tools like one-click install, managed updates, WP-Cli, WordPress staging and git integration, which can help you easily create and manage your WordPress sites. Besides, SiteGround has a very fast support team with advanced WordPress expertise available 24/7!
Currently there are 3 WordPress Hosting plans at SiteGround:
- StartUp: $3.99/mo. (Discounted from $14.99/mo.); ~ 10,000 Visits/mo.
- GrowBig: $6.69/mo. (Discounted from $24.99/mo.); ~ 100,000 Visits/mo.
- GoGeek: $10.69/mo. (Discounted from $39.99/mo.) ~ 400,000 Visits/mo.
For more information about these plans, please visit Compare Hosting Features page.
Note: SiteGround requires an annual purchase paid in advance for the special price to apply. Special prices are applicable for your first invoice. For all subsequent renewals regular prices apply.
Create a WordPress site manually
If you’d like to create a site manually, just follow the step-by-step instructions below.
Before starting
Before starting, you need to make sure that you have the following:
- A virtual private server (VPS) that is running on Ubuntu 20.04
- The root user credentials (check with your VPS provider if you don’t know)
- Connect your domain name to your VPS server (refer to this article if you don’t know how)
Note: This guide will detail how to buid a WordPress site from scratch. In this guide, the site will be built using Ubuntu 20.04 + NGINX + PHP 7.4 + MySQL.
Step 1: Login to your VPS as the root user via Secure Shell (SSH)
The whole process would be much easier if you login to your VPS as the root user. To login as the root user:
- Launch the Terminal app. For Windows users, you can use Windows Terminal app or Windows Powershell; for Mac user, use the Terminal app.
- Execute the following command to Login to your VPS as the root user via SSH.
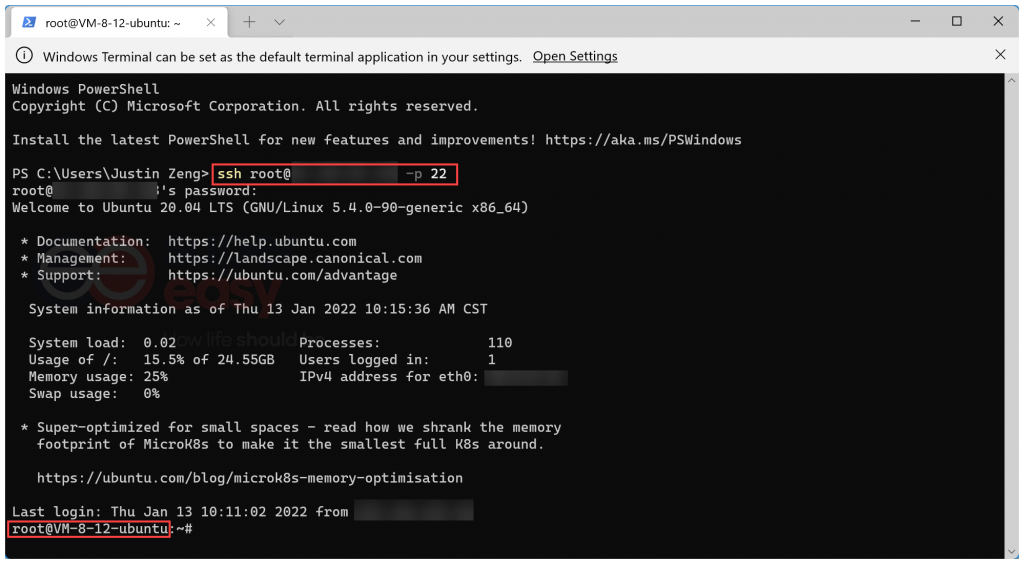
ssh root@your server's public ip address -p 22
for example, if your server’s public ip address is 12.456.78.901, then you should enterssh root@12.456.78.901 -p 22 - Enter the root password and press Enter to login. For security reasons, the password will be insivible when you’re typing.
When you see “Welcome to Ubuntu 20.04…”, and the current user in the Terminal app has switched to root@xxxx, it suggests that you’ve login to your VPS as the root user.
Step 2: Install NGINX
Execute the following command to install NGINX:
apt install nginxVist your server’s public ip address on your browser. If you see the following “Welcome to nginx!” page, it suggests that you’ve installed NGINX on your VPS.
Welcome to nginx!
If you see this page, the nginx web server is successfully installed and working. Further configuration is required.
For online documentation and support please refer to nginx.org.
Commercial support is available at nginx.com.
Thank you for using nginx.
Note: if you don’t see the “Welcome to nginx!” page, make sure that the firewall port 80 on your VPS is open.
Step 3: Install PHP and its extensions
1. Execute the command below to install PHP and its extensions:
apt install php-fpm php-mysql php-gd php-curl php-dom php-mbstring php-imagick php-zipStep 4: Install MySQL
1. Execute the command below to install MySQL:
apt install mysql-server2. After the command above is complete, execute:
mysql_secure_installation3. You’ll be asked if you’d like to setup VALIDATE PASSWORD component. Enter Y and press Enter.
4. Enter 2 to select the strong of the password calidation policy, then press Enter.
There are three levels of password validation policy:
 LOW    Length >= 8
 MEDIUM Length >= 8, numeric, mixed case, and special characters
 STRONG Length >= 8, numeric, mixed case, special characters and dictionary                  file
 Please enter 0 = LOW, 1 = MEDIUM and 2 = STRONG: 2
5. Set a new the MySQL password. The new password should contain numbers, mixed case and special characters. Re-enter the password to comfirm.
6. Enter Y and press Enter to continue with the password you provided in step 5.
7. Enter Y and press Enter, then repeat three times to romove anonmous users, disallow root login remotely, remove test database and reload privilege tables.
8. Run the command below and enter the password you set in step 5 to login to MySQL. When you see “mysql>” in the buttom, it suggests that you’ve entered MySQL.
mysql -uroot -p9. Execute the command below to create a database named wordpress:
CREATE DATABASE IF NOT EXISTS wordpress DEFAULT CHARACTER SET = utf8mb4 DEFAULT COLLATE = utf8mb4_general_ci;If you see the following prompt, the database creation is successful:
Query OK, 1 row affected (0.01 sec)
10. Execute the command below to create a database user named wordpress to operate the wordpress database created in step 9. You’ll need to set your own password in the password part of the command.
CREATE USER 'wordpress'@'localhost' IDENTIFIED BY 'password';
For instance, if you want to set the password to Pw20220213*, then the command should be:
CREATE USER 'wordpress'@'localhost' IDENTIFIED BY 'Pw20220213*';11. Execute the folllowing command below to grant the user wordpress all privileges on the wordpress database.
GRANT ALL PRIVILEGES ON wordpress.* TO 'wordpress'@'localhost' WITH GRANT OPTION;12. Run the command below to flush database privileges:
FLUSH PRIVILEGES;13. Run the command below to exit MySQL:
exit;Step 5: Download the WordPress Installer
1. Run the command below to download the latest WordPress installer to the path /var/www, and name the download file as wordpress.tar.gz:
curl https://wordpress.org/latest.tar.gz -o /var/www/wordpress.tar.gz
2. Go to the /var/www directory:
cd /var/www3. Unzip the wordpress.tar.gz downloaded earlier to the current folder:
tar -zxvf wordpress.tar.gz4. Modify the user group permissions for the folder /var/www/wordpress:
chown -R www-data:www-data /var/www/wordpressStep 6: Modify the NGINX configuration file
Follow the steps below to modify the NGINX .conf file.
1. Make a copy of the default .conf file. You’ll need to replace “domain” in the command to the domain name of your site.
cp /etc/nginx/sites-available/default /etc/nginx/sites-available/domain.conf
2. Use the Vim editor to open the NGINX .conf file for modification. Remember to replace “domain” in the command to the domain name of your site before executing the command.
vi /etc/nginx/sites-available/domain.confNote: if you’re told that bash: vi: command not found., execute the command below to install Vim first:
apt install vim3. Once you opend the NGINX .conf file, press the i key on your keyboard to start editing and modify the NGINX .conf as follows. Then press Esc on your keyboard to quit editing. Enter :wq to save the changes and close the .conf file.
server {listen 80;listen [::]:80;root /var/www/wordpress;index index.php;server_name {your-domain};location / {try_files $uri $uri/ =404;}location ~ \.php$ {include snippets/fastcgi-php.conf;fastcgi_pass unix:/var/run/php/php7.4-fpm.sock;}}
Note: remember to replace {your-domain} with the domain name of your site. For example, if the domain name of your site is example.com, then the server_name part in the .conf file should be server_name example.com;.
Besides, when writing this guide, the PHP version I installed is PHP 7.4. Remember to replace it with the version you installed when modifying the configuration.
You can run the command php -v to check the corresponding PHP version installed on your VPS server.
4. Run the command below to remove the default configuration in use:
rm /etc/nginx/sites-enabled/default5. Sync the modified .conf file to the path: /etc/nginx/sites-enabled/. Before executing the command below, you need to modify the the {domain} part.
ln -s /etc/nginx/sites-available/{domain}.conf /etc/nginx/sites-enabled/
6. Test the NGINX .conf file:
nginx -t7. Reload the NGINX .conf file to take effect:
nginx -s reloadStep 7: Install WordPress
Follow the steps below to install WordPress:
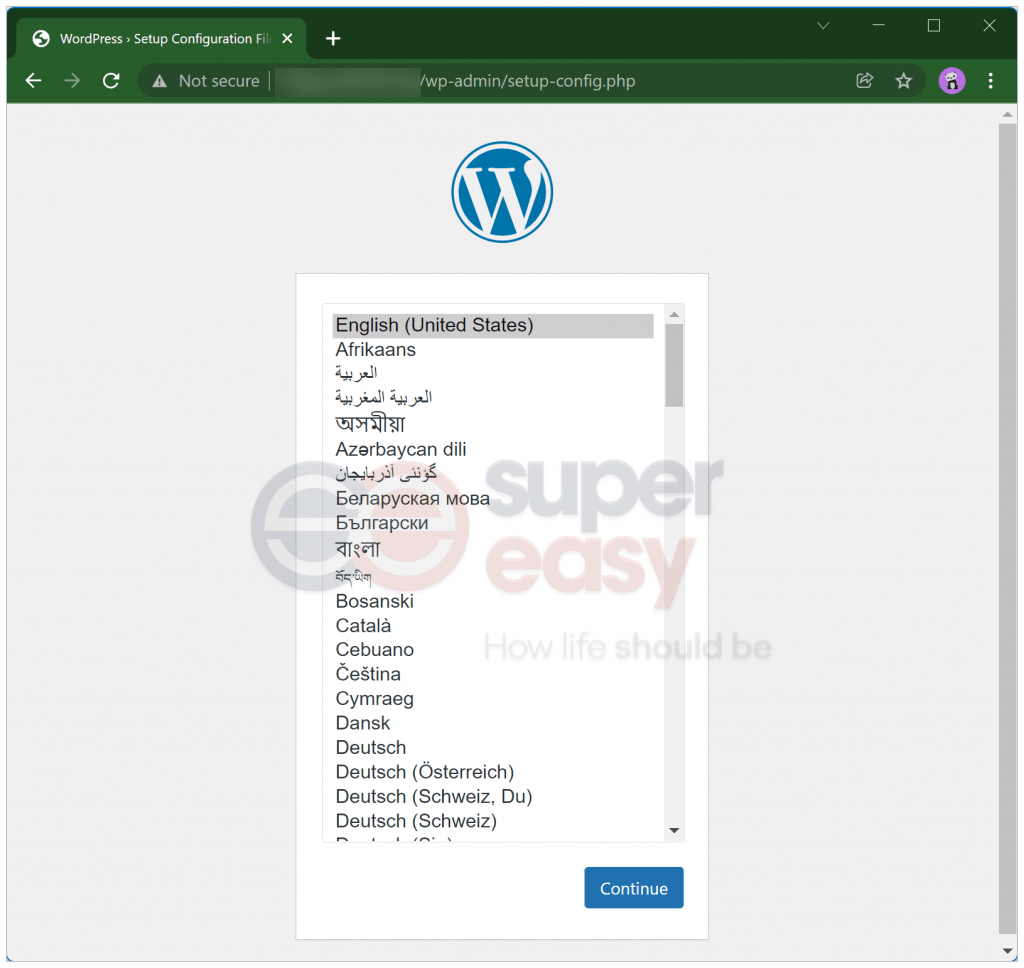
1. Vist your website through the domain name. if your domain is propgated, you should be able to see the Choose WordPress Lanague screen (wordpress setup-config.php). If your site won’t open, try to visit your site through the public ip address of your VPS server instead.
Select WordPress language and click Continue.
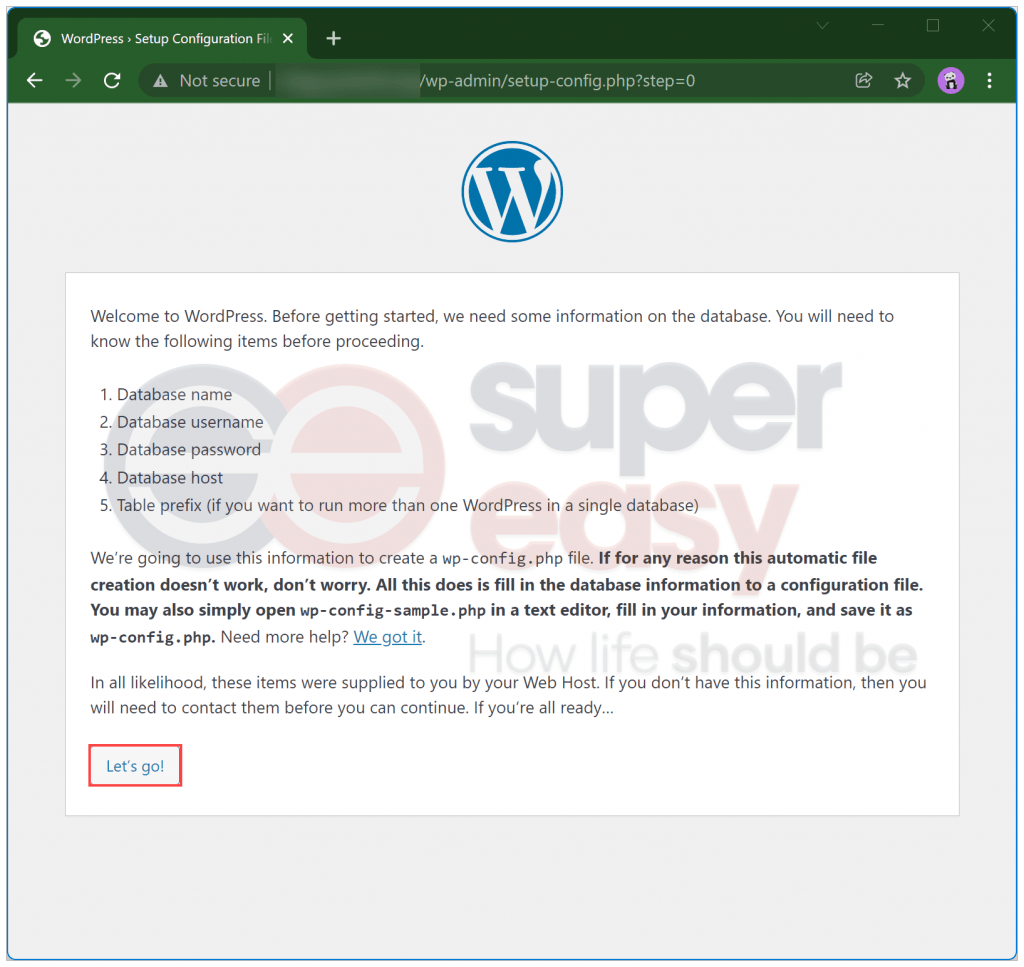
2. Click Let’s go!
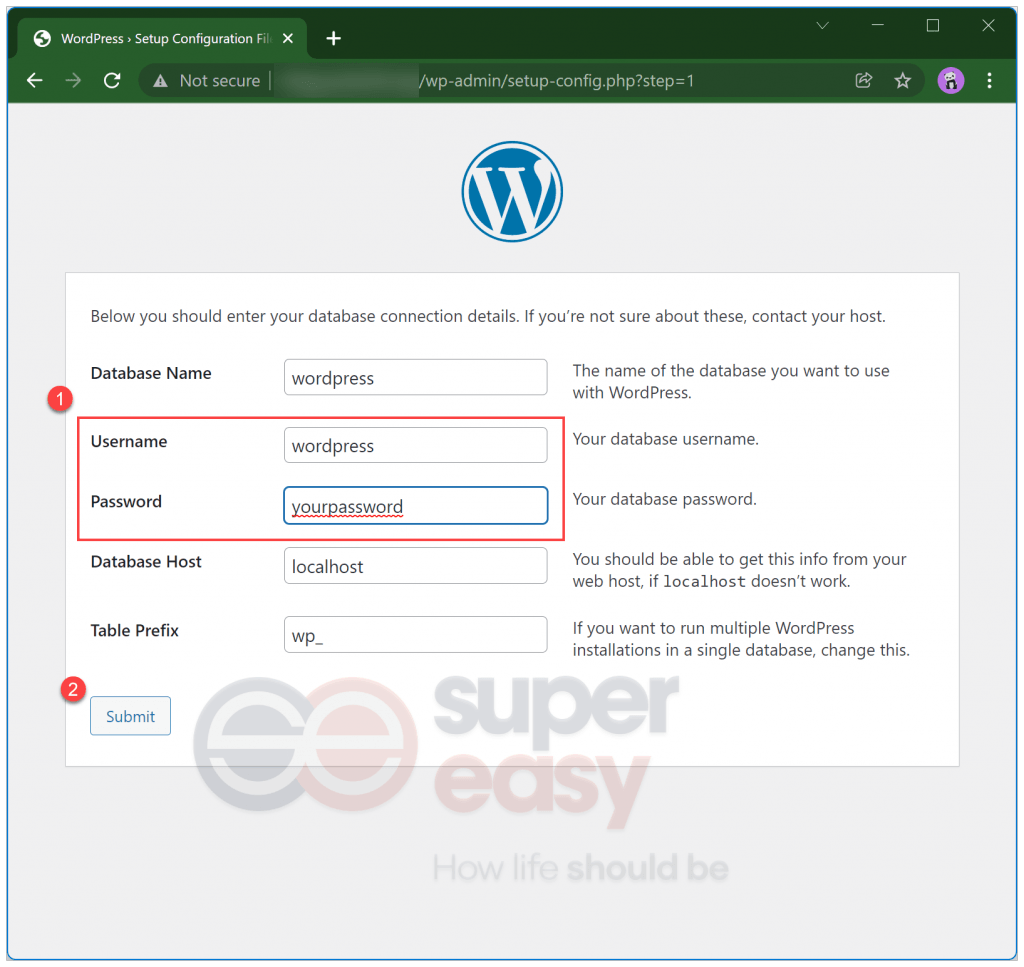
3. Enter the wordperss database connection details. Here we just need to modify the Username to wordpress, and enter the database password you set in step 4-10. Then click Submit.
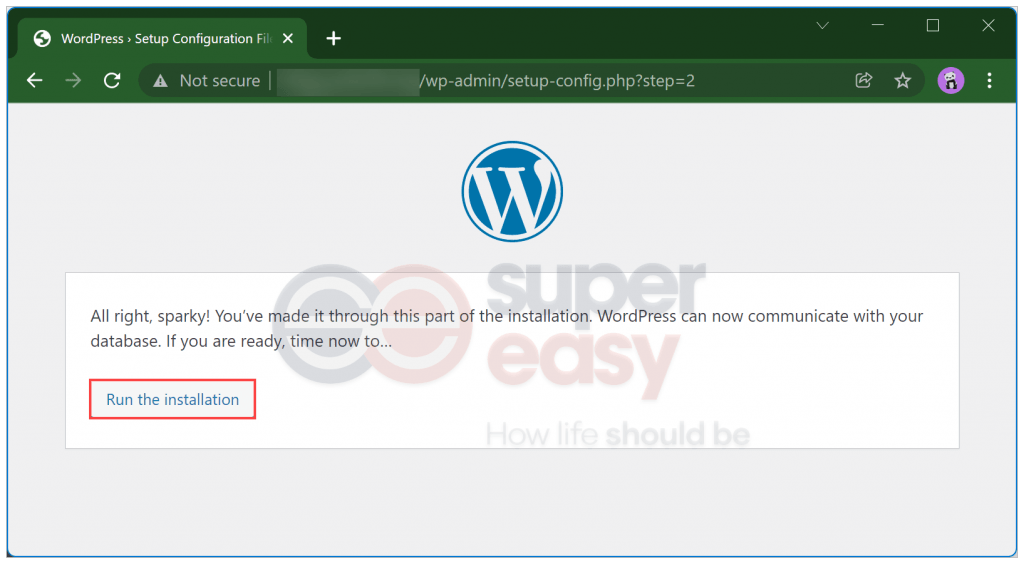
4. Click Run the installation.
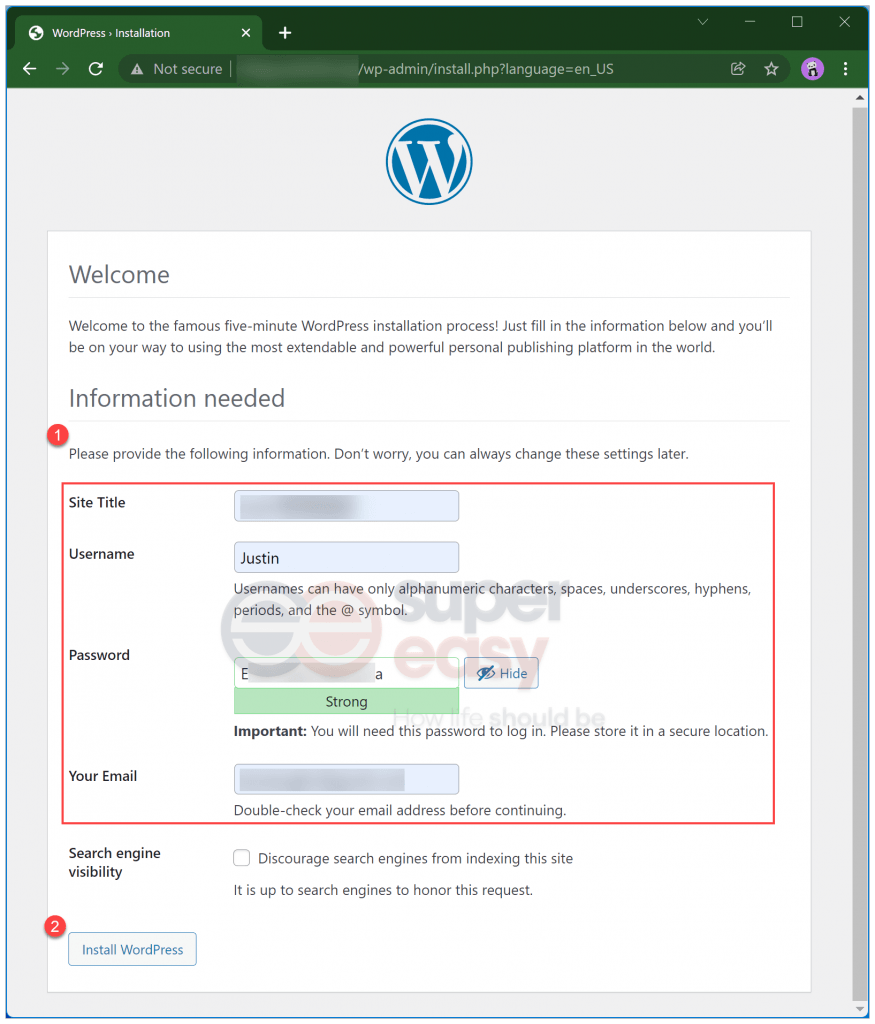
5. On the welcome screen, enter your site title, WordPress username & password, and your WordPress admin email, then click Install WordPress.
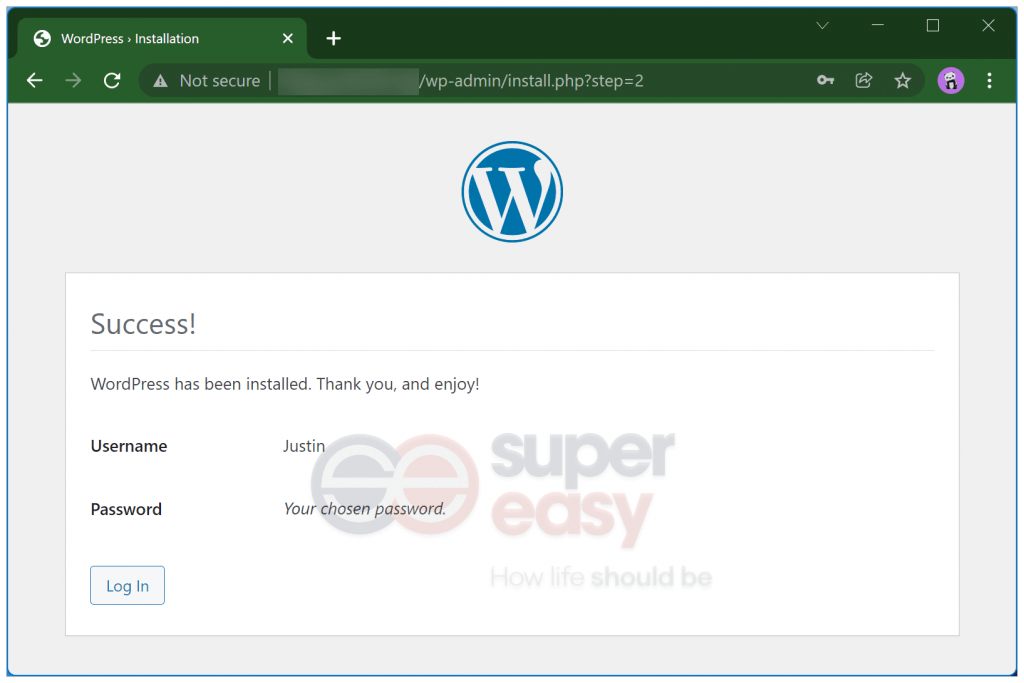
6. When you see the Success screen, congrats! WordPress has been installed on your VPS.
Step 8: Enable HTTPS
To encrypt data transferring to and from your server, you need to enable HTTPS. Besides, HTTPS has been a ranking signal in Google search ranking algorithms since 2014, which means that sites using secure and encrypted connections will rank better.
To enable HTTPS, you need to get a certificate from a Certificate Authority. In this part, you’ll learn how to get a free certificate for your website’s domain from Let’s Encrypt, a nonprofit Certificate Authority providing TLS certificates to 260 million websites. Here’s how:
1. Login to your VPS as the root user via Secure Shell (SSH).
2. Execute the following comands in sequence:
sudo apt update
sudo apt install certbot
sudo apt-get install python3-certbot-nginx
certbot --nginx
3. Enter your email address for urgent renewal and security notices, then press Enter to continue.
4. Enter A and press Enter to agree to the Terms of Service. Then enter n and press Enter to not share your email address with the Electronic Frontier Foundation.
5. When the certbot ask you which domain names you would like to activate HTTPS for, enter the number next the domain name and press Enter.
Which names would you like to activate HTTPS for?

1: example.com

Select the appropriate numbers separated by commas and/or spaces, or leave input
blank to select all options shown (Enter 'c' to cancel): 1
6. Enter 1 or 2 to choose whether or not to redirect HTTP traffic to HTTPS, removing HTTP access. Since this is a new site, so here I’d like to enter 2 to redirect HTTP traffic to HTTPS.
Please choose whether or not to redirect HTTP traffic to HTTPS, removing HTTP access.

1: No redirect - Make no further changes to the webserver configuration.
2: Redirect - Make all requests redirect to secure HTTPS access. Choose this for
new sites, or if you're confident your site works on HTTPS. You can undo this
change by editing your web server's configuration.

Select the appropriate number [1-2] then [enter] (press 'c' to cancel): 2
7. Run the command below to start creating a scheduled task for the certificate renewal:
crontab -e8. Enter 2 and press Enter.
Select an editor.  To change later, run 'select-editor'.
 /bin/nano        <---- easiest
 /usr/bin/vim.basic
 /usr/bin/vim.tiny
 /bin/ed
 Choose 1-4 [1]: 2
9. Press the i key on your keyboard to start editing. On a new line, add the following command:
0 0 */5 * * /usr/bin/certbot renew &>/var/log/certbot-renew.log
Then press Esc to stop editing. Enter :wq on your keyboard and press Enter to save the changes.
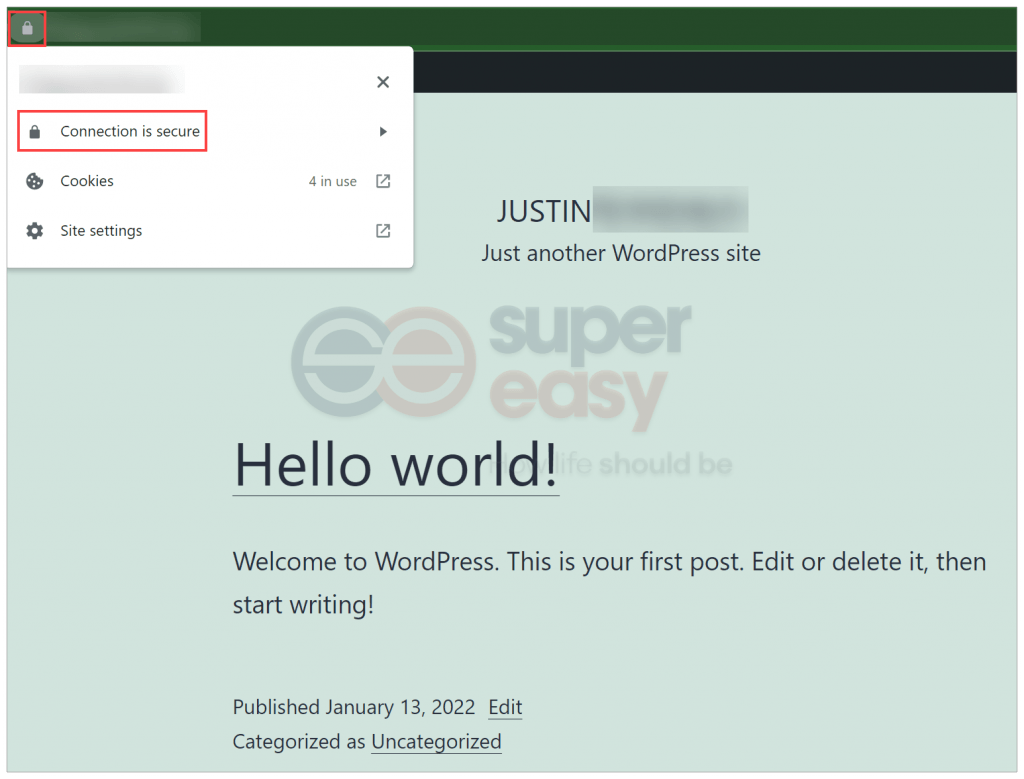
10. Launch your browser to visit your site. You’ll see your site has enabled HTTPS, and even if you’re visiting the http URL, it will automatically redirected to the https URL.
Hopefully, after reading this article, you’ve learned how to create a website. Feel free to drop a line if you have any questions or suggestions on this topic. Thanks for reading!
Abstract vector created by freepik – www.freepik.com


")


")


